
Which registers can be synchronised?
How to set up a master company
Synchronization rules
Manually synchronise settings
Save synchronization settings
Synchronization options
Schedule synchronization
Log
The master company can be used to simplify your administration and ensure a consistent configuration across multiple companies in Flex HRM. You appoint one company as the master company and then use its settings in other companies (target companies). This means you can make changes in one company and have them take effect in several others.
Example
Companies 18407, 18421 and 184212 should, in some cases, have identical settings in Flex HRM. We set 18407 as the master company for the other two to avoid having to make the same settings in three places every time something needs to be changed.
|
We create a synchronisation of the registers Additional fields and own pages, Pay codes, Time codes and Reason for absence. Other registers can have different settings in the various companies, so we choose not to sync these and will process them separately in each company.
|
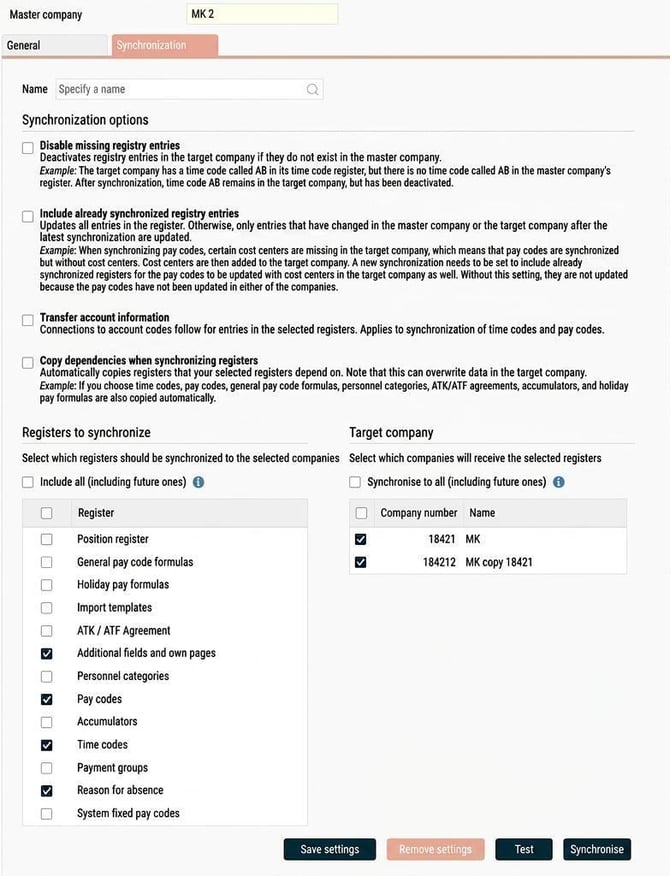
|
|
To avoid the risk of the settings differing between companies, we specify that the registers being synced cannot be edited in the target companies, and that a synchronisation should take place automatically each time any of the registers in company 18407 are changed.
|
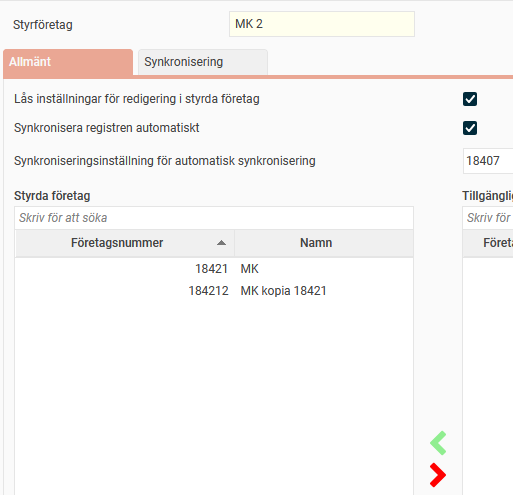
|
|
In the target companies, we can now only view settings for Additional fields and own pages, Pay codes, Time codes and Reason for absence, but cannot change anything.
|
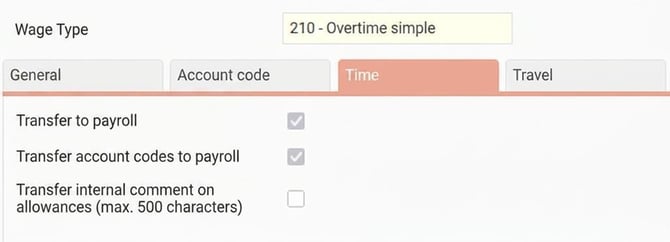
|
|
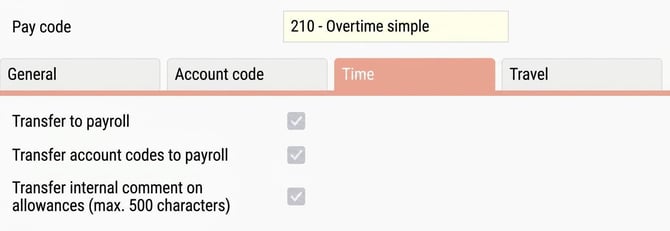
If we change anything in these registers in company 18407, it immediately takes effect in the other companies.
|
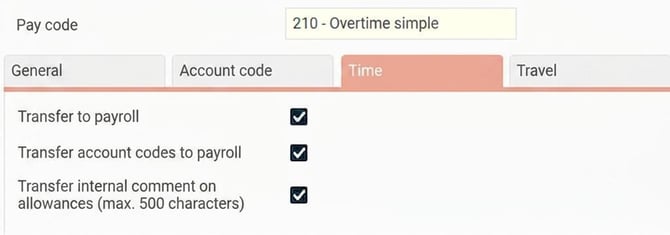
|
Please note
Before you perform a synchronization:
Go through the synchronization options, so that all settings are as you want them.
It is recommended to do a test first, to see the outcome.
A synchronization cannot be reversed.
Which registers can be synchronised?
The following registers can be synchronised from the master company to your target companies:
-
Position register
-
General formulas for pay codes
-
Holiday pay formulas
-
Import templates
-
ATK / ATF Agreement
-
Additional fields and own pages
-
Personnel categories
-
Pay codes
-
Accumulators
-
Time codes
-
Payment groups
-
Reason for absence
-
System fixed pay codes
How to set up a master company
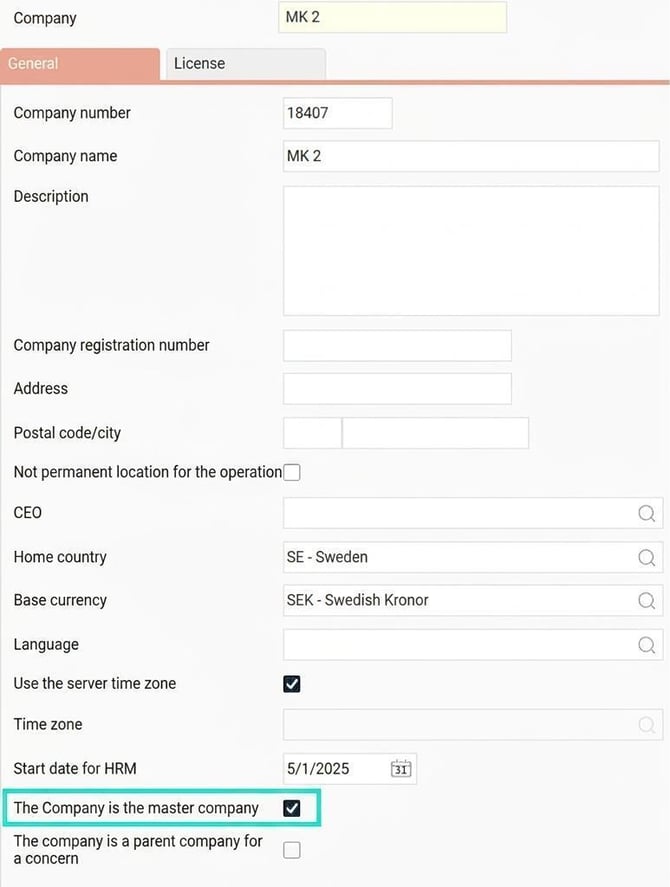
Select which company is to be the master company
|
|
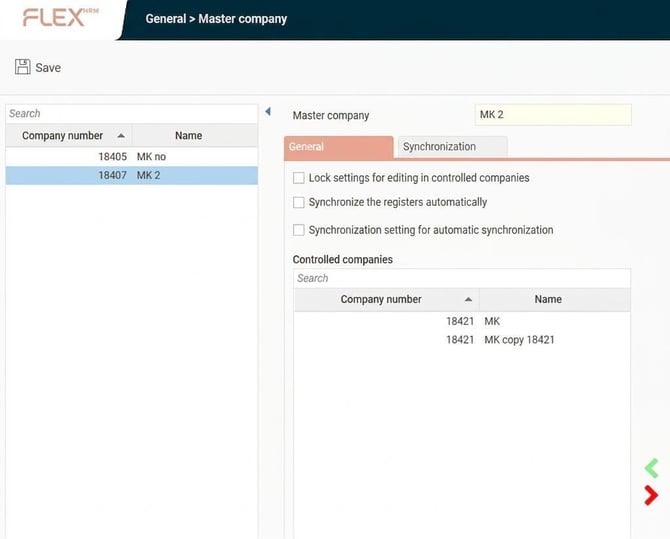
Select which companies to control (target companies)
|
|
| A company that is controlled displays this information under General > Company. | 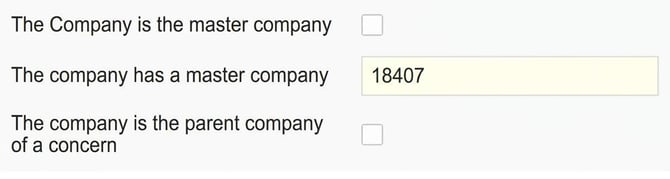
|
Synchronization rules
You can set rules for how synchronization between master and target companies should be done under General > Master company, the tab General.
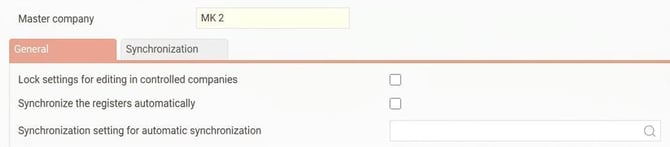
- Lock settings for editing in controlled companies
You can choose for the settings that are to be synchronized to be locked in all controlled companies. This prevents the settings from being changed manually in the target companies and ensures that they are always synchronised with the master company.
Example: If the setting is locked, for example, the time code settings are visible in the controlled company, but you cannot change them. All changes must be made in the master company. - Synchronize the registers automatically
If you tick this box, an automatic synchronization to all controlled companies will occur as soon as you save a setting in the master company. Alternatively, you can synchronise manually or schedule the synchronization. - Synchronization setting for automatic synchronization
If you choose automatic synchronization, you must also specify which settings and which companies are to be synchronised. Create these synchronization settings under the adjacent tab Synchronization.
Manually synchronise settings
On the tab Synchronization you can perform manual synchronization of settings. You can also save settings here for use in automatic or scheduled synchronization.
Please note
Before you perform a synchronization:
Go through the synchronization options, so that all settings are as you want them.
It is recommended to do a test first, to see the outcome.
Perform a manual synchronization
-
Go to General > Master company.
-
Select company and the tab Synchronization.
-
Select the register(s) you wish to synchronise.
-
Select the companies you wish to synchronise to.
- Make your selections under synchronization options.
-
Click on Synchronise.
You will receive notes confirming the synchronization and informing you when it is complete. Click on Show log to view information about the synchronization and any error message.
Test the synchronization
If you want to check the result before carrying out the synchronization, click the button Test instead of Synchronise. When the test synchronization is complete, you will receive a temporary test log to check any errors and warnings that will occur if you choose to synchronize.
Save synchronization settings
To schedule synchronization or set up automatic syncing, you need to save your settings.
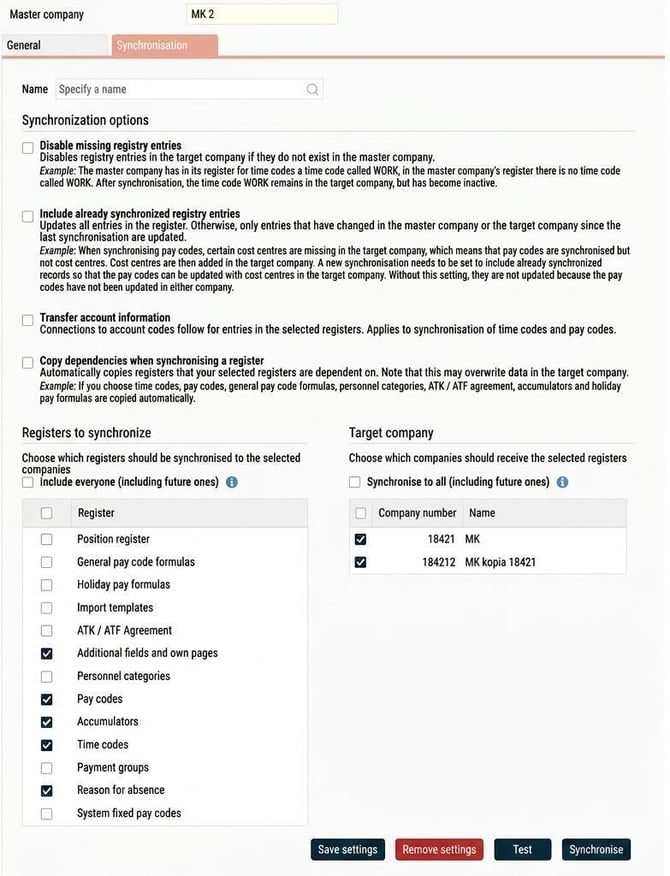
-
Specify a name for the setting.
- Make your selections for synchronization options.
-
Set your choices for register and company. If you select All this will also apply for target companies added in the future, and for new registers, if the possibility to synchronise more registers is added to the system.
-
Click on Save settings.
The setting will then be available for scheduling and automatic syncing.
Synchronization options
In addition to choosing register and company, there are four further settings on how the synchronization should be done.
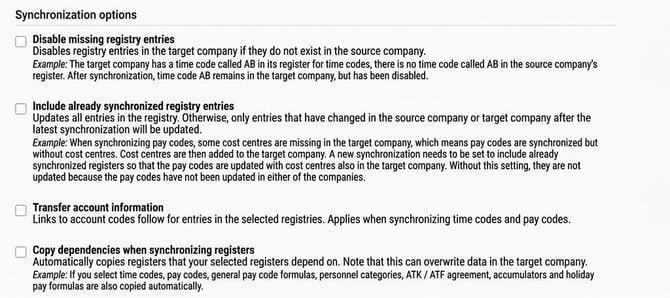
-
Disable missing registry entries: When synchronising, all entries from the master company are transferred. If you tick this box, registry entries found in the target company but not in the master company will be retained, but they will be inactive. If you do not tick the box, the entries are kept and remain active.
-
Include already synchronized registry entries: Updates all entries in the selected register. Otherwise, only those entries that have been changed in the master or target company since the latest synchronization are updated.
Example: When synchronising pay codes, some cost centres are missing in the target company, resulting in pay codes being synchronised but without cost centres. The cost centres are then entered in the target company. A new synchronization needs to be set to include already synchronised registers for the pay codes to be updated with cost centres in the target company. Without this setting, they are not updated because the pay codes have not been changed in either company.
-
Transfer account information: Connections to account codes follow for entries in the selected registers. This applies for synchronization of time codes and pay codes.
-
Copy dependencies when synchronising registers (requires authorisation Implementation support Payroll): Automatically copying registers that your selected registers depend on. Please note that this may overwrite data in the target company.
Example: If you select time codes, pay codes, general formulas for pay codes, personnel categories, ATK / ATF agreement, accumulators and holiday pay formulas are also automatically copied.
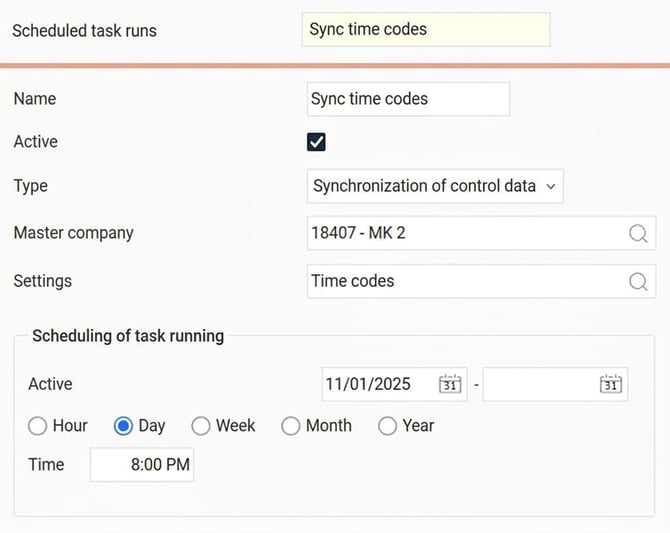
Schedule synchronization
You can schedule synchronization of control data to run every hour, day, week, month, or year.
|
|
Log
The log shows which synchronizations have been performed and any errors or warnings.
-
Go to General > Master company.
-
Select a company.
- Go to the tab Synchronization.
- Click on Show log.
- The log can be viewed in a pop-up window or downloaded as a file.
The log shows manual, automatic and scheduled synchronizations, but does not show whether the synchronization was manual, automatic or scheduled. In the case of automatic synchronization, the user who saved the automatic synchronization setting is displayed, not the user who triggered the synchronization through a change in the master company.
Please note: This article is AI-translated. This means that linguistic errors or misunderstandings may occur.