
Preparations: Specify organizational units
Before you can build the tree, you need to configure which account code dimensions will serve as organizational units. These units will make up the different levels and branches in your organizational chart.
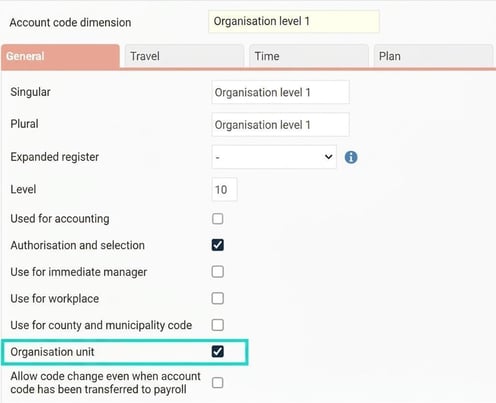
Build the organizational chart itself
Once you have set up your account code dimensions, you can start building the structure.
You do this under Settings > Personnel > Organizational chart.
To create a new part in the tree, do as follows:
-
Click on New.
-
Select Over level, account code dimension, account code, any heading and executives.
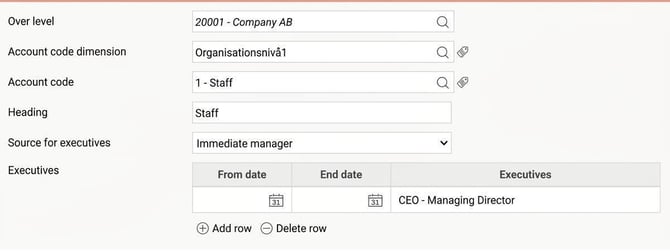
-
Save.
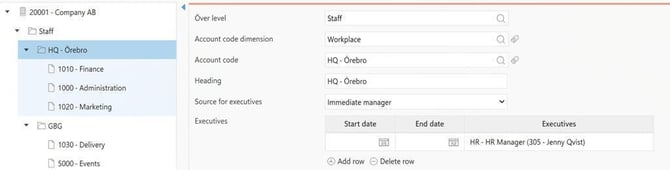
Once you have created a part in the tree, you can then add sub levels to the tree.
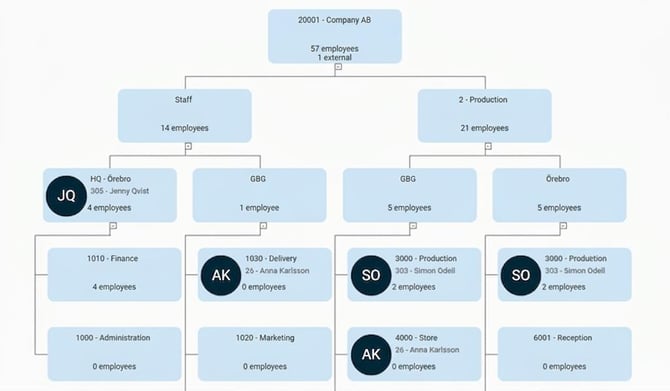
In the example below, the workplace "HQ - Örebro" has been added as a sub level to "Staff".
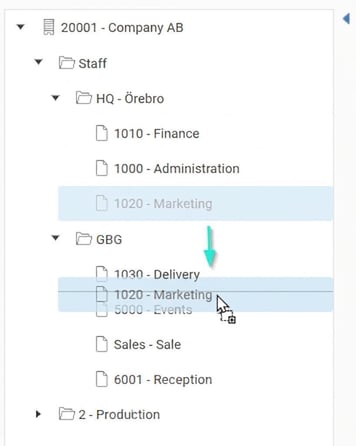
You can easily move a unit in the tree by clicking, dragging, and dropping it to the desired location (drag and drop). The image shows how the marketing department is being moved in the tree from "HQ - Örebro" to "GBG".
At the top of the page, you can preview to see what the tree looks like as you are building it.
How the hierarchy in the tree works
If several parts (nodes) in the tree are to be placed under each other, you link them by specifying an Over level.
It is important to know that an employee who is to be visible in a node at the very bottom of a branch must belong to all overlying organizational units in the same branch.
This also means that the employee will appear in all overlying organizational nodes when you expand them.
Example: In the image below, the tree has three levels:
-
Level 1: Staff
-
Level 2: HQ - Örebro
-
Level 3: Finance
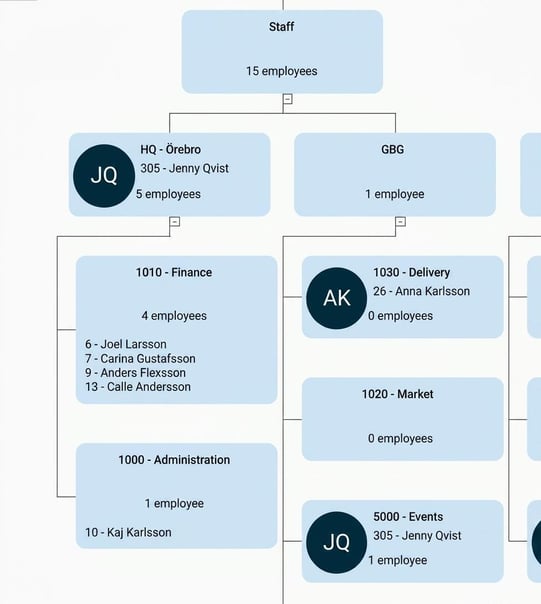
For the employee to be visible when you click on Finance, they must belong to Staff, HQ-Örebro, and Finance. See the example below where employee 6 is visible under Finance.
Connect employees to the organizational chart
For an employee to be displayed correctly in the organizational chart, you need to specify their organizational affiliation. You do this under the tab Account code in Employee register.
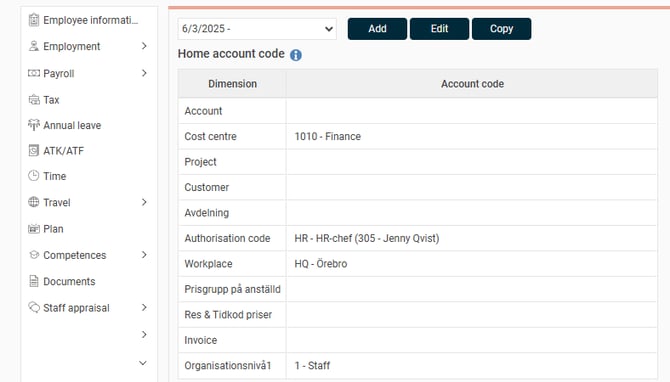
In the example above, the employee is then linked to the following account codes to be placed correctly in the organizational chart:
Staff (Organisation level 1) --> Level 1
KQ Örebro (Workplace) ---> Level 2
1010 Finance (Cost centre) --> Level 3
If no account codes are specified for an employee, they will not appear in any of the tree's nodes, but only under the top level for the company.
External personnel
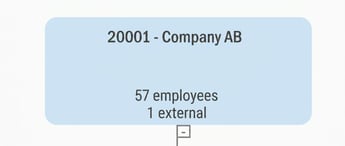
At the top level for the company, you will see external staff, i.e. those marked with employment type External personnel in the employee register. External personnel are not shown in the sub levels of the tree.
Add CEO at the top of the tree
If you want the company's CEO to appear at the very top of the structure, directly under the company name, you specify this under General > Company.
Find employees without affiliation
To easily find employees who are not yet linked to a part of the organizational chart, you can go to Employee register > List and click on Missing organizational affiliation.

Please note that it is currently not possible to add fully standalone nodes in the tree. For example, if you wish to add a staff function or management group completely separate from others in the tree. The system is based on all units being logically linked in a hierarchical chain.
Getting started with the organizational chart
Once your organizational chart is fully built, you can start using the organization overview on the front page and get a clear overview of the organization in the system's various views.
You can read more here about how to use the organization overview.
Please note: This article is AI-translated. This means that linguistic errors or misunderstandings may occur.