
⚙️Administrator setting up Verified for e-signing? Here you will find the settings.
Integration to Verified
With this module, you can send Contracts of employment, HR-forms and CVs for digital signing in Verified from within HRM, eliminating paper handling and manual signatures. Managers, HR, and others will get a complete overview in HRM of all ongoing and signed documents and don't need to use several systems to manage them.
Verified handles email notifications to all signatories, reminders about documents that are yet to be signed and the technical signing process. All documents are available in both HRM and Verified.
Digital signing of documents via Verified
Below is a description of the workflow for digital signing of documents in HRM.
Send documents for e-signing
To send a document for e-signing, follow the steps below.
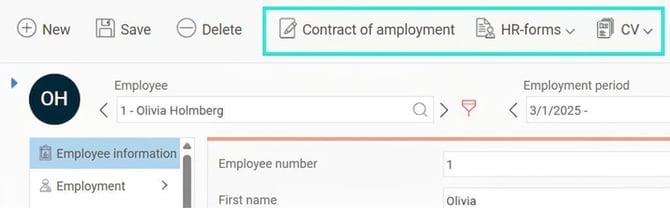
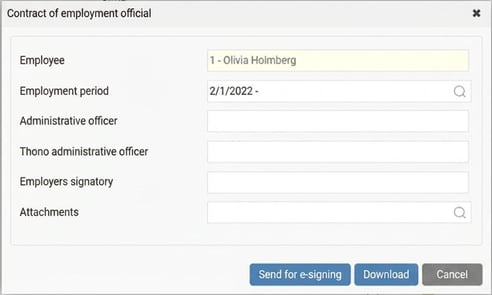
2. In the next step, make the selections you want, such as adding attachments to the contract of employment. You can then choose to download the contract as before by clicking the Download button, or instead send the contract for digital signing by clicking the Send for e-signing button.
3. In the next step, you select who needs to sign and if you want to set a deadline for the signing.
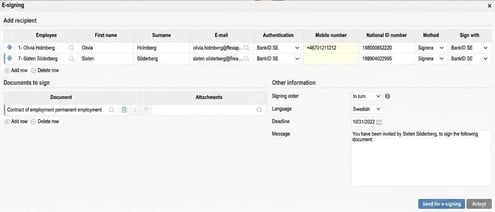
The system will by default suggest that the employee concerned and the logged in user should sign the document. The idea is that, for example, a contract of employment should be signed both by the employee and by a manager sending the contract for signing. If you want someone else, or perhaps only the employee, to sign instead, you can add and remove recipients for signing.
If the recipient is in the current company and you have authorisation, you can easily select them in the first column. You can also choose whether to use the employee’s work or private email address. If another person should sign, you can fill in their name and email address manually instead.
4. The authentication option relates to how the person opening the document will prove their identity to ensure no one else opens the document. If authentication is to be done with BankID, you need to specify the National ID number as well.
5. Then you select whether the recipient should sign or approve the document. Signing is stronger and legally binding, whereas approval is not considered legally binding. If you chose signing, you must also indicate whether signing should be done with BankID or any of the other signing methods provided by Verified.
You can also choose which language applies for the recipient during the signing process.
6. In the list of documents to sign, you can see which documents and attachments will be sent for signing. Here you can also add or remove documents to be signed. All documents will be handled together in what Verified calls an envelope, which is signed together.

7. Before sending a document for signing, you can preview it by clicking the document icon with the magnifying glass. If you wish to edit the document before sending, first click the middle icon, Download, edit the document, save it on your computer, and then click the right-hand icon, Upload, to upload your edited document for signing. Note that the Upload icon only becomes active after you have downloaded the document first.

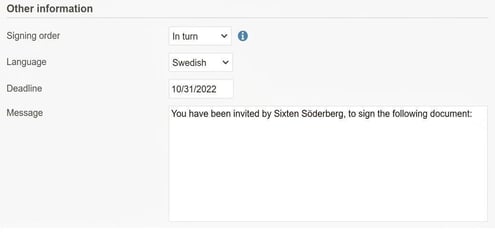
8. Signing sequence means you can choose whether recipients should sign in turn or if all recipients can sign the document in parallel.
You can also set a deadline for the signing. Verified will then send reminders to recipients as the deadline approaches according to the settings you have made under the program link.
If you wish, you can also change the message that the recipient receives when signing the document.
Sign a document
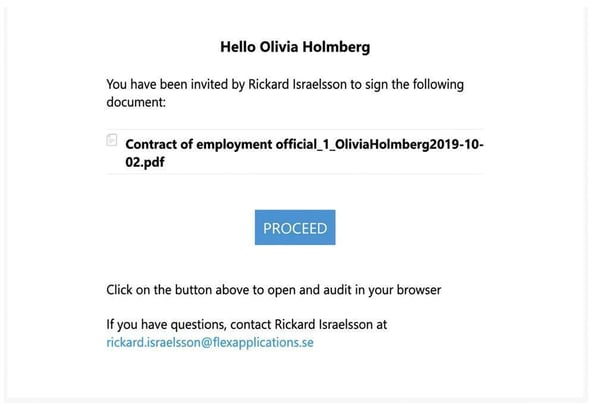
The recipient who is to sign a document receives an email that looks similar to the image below. To audit and sign the document, just follow the instructions.
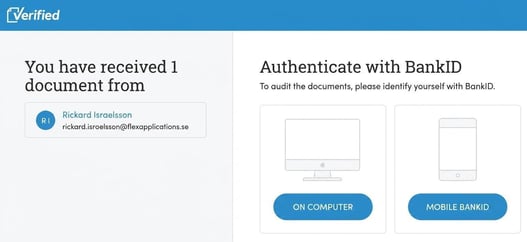
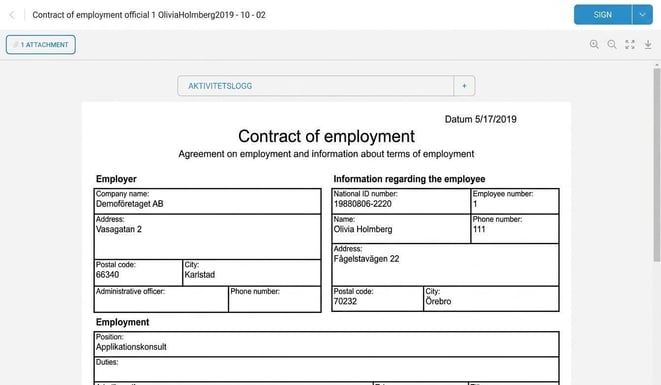
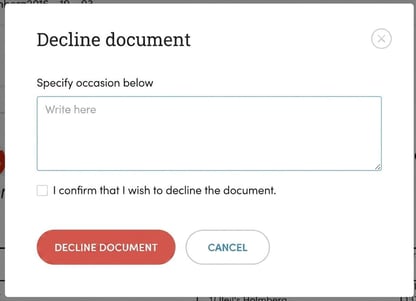
3. At the top right you can choose to sign or decline the agreement. You can also download your own copies of the documents.
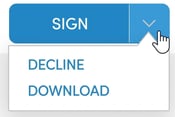
If you choose to decline, you must specify the reason, which is then sent back to the sender.
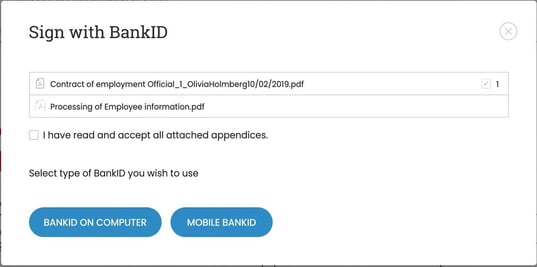
If you choose to sign the document, you will first need to confirm in this dialogue box that you approve any attachments, and then select the type of BankID you wish to sign with.
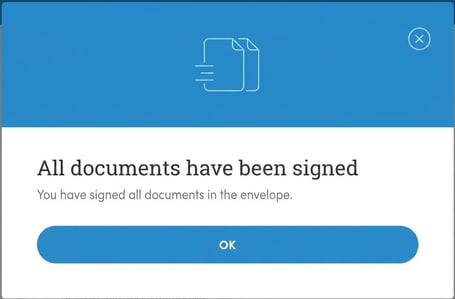
The employee’s documents
On the Documents tab in the Employee register, you can see both documents saved in Flex HRM and documents sent for e-signing.
For documents sent for e-signing, updated information appears in the Status column. Current status is retrieved from Verified every time you visit the tab. If you click the info icon next to the status, you’ll find out who is to sign and the status for each recipient.
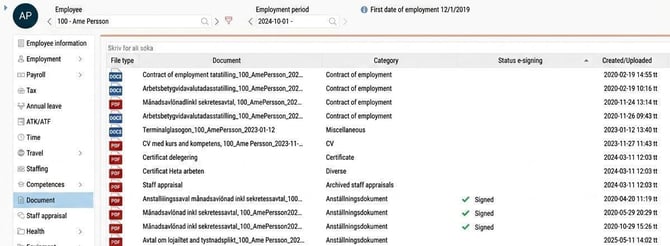
Here, you can also download and open a document sent for e-signing in the same way as other documents. If the document is signed, the last page of the document includes technical information about the signing, making the document legally binding.

Overview for e-signing
If you want an overview of all documents sent for e-signing, you can use the overview view found under Personnel – E-signing. Here you see documents for the employees you are authorised to view in this window, allowing a manager to see documents relevant to their group and someone in HR to see an overview of the entire company.
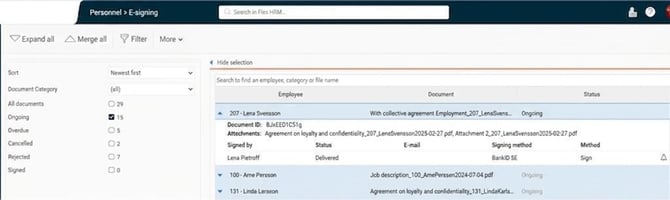
On the left of the view you can select which documents should be displayed. The number next to the tick boxes for each status shows how many documents exist for the current status.
The list contains one row per document sent for signing. Here you can see which employee the document concerns as well as the status. By clicking on the row you can see more details about who is to sign the document. You can also send a reminder to a recipient by clicking the bell furthest to the right.
If you realise the wrong document has been sent, you can also cancel the e-signing by marking the row and clicking the button below the list. There is also a button here to download the document.

Please note: This article is AI-translated. This means that linguistic errors or misunderstandings may occur.