
Here you’ll find more information about how to build your own pages and fields in HRM
Example of different types of additional fields
💡Below are examples of the various types of fields you can build
Text field with date history
Radio buttons and lists
Form templates and staff appraisals
Fields with stars and checkboxes
Tables
Date field for monitoring
Example: IT equipment with field group with date history and text as field type
Selectable with date history
You can choose whether the values of fields in a field group can be saved with or without date history. This selection is made when you create the field group for the first time and cannot be changed afterwards.
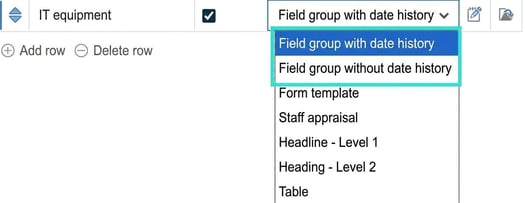
Field with date history is used to enable date control for a value and to maintain historical data on value changes. This is useful for, for example, pay rises and various benefits.
In the employee register, the field is displayed as below, showing the current value for each field. To change the value and see the date history, click the icon on the right of the row.
Here is an example of how things might look when using date fields:
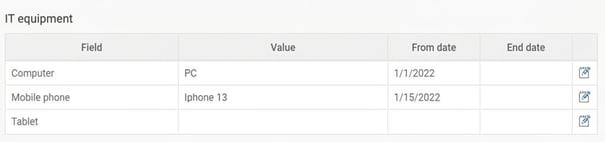
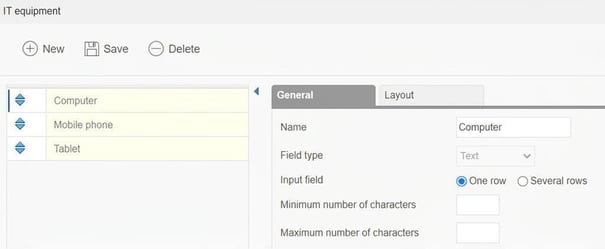
The above example is set up according to the images below:

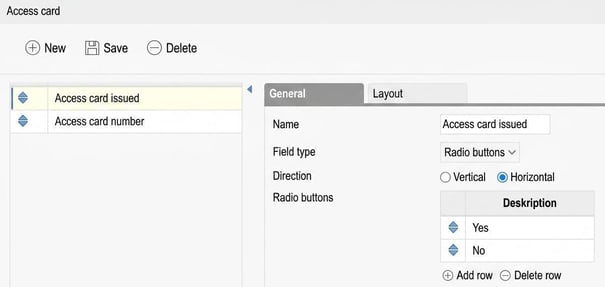
Example: Access equipment – with Headline - Level 1, field group without date history and radio buttons
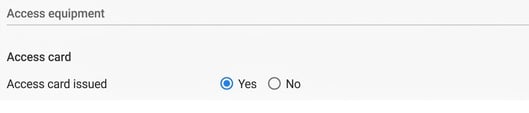
To set up the above field, follow the steps shown in the images below:

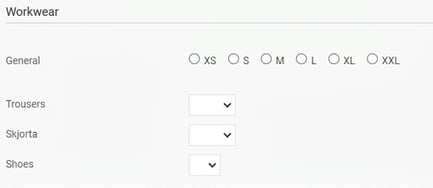
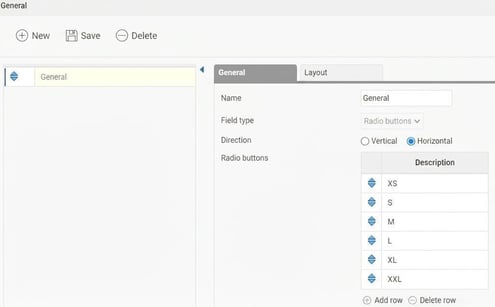
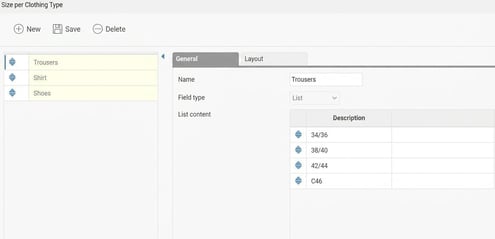
Example: Workwear – with Headline - Level 1, field group without date history and field type radio buttons and list
To set up the above field, follow the steps shown in the images below:

Example: Form templates or staff appraisals – with form template/staff appraisal with grading, headings and text field
HRM Employee offers system support to streamline the handling of staff appraisals and gathers information in one place without needing to work with external document templates. You can create several different templates for staff appraisals to use for various types of conversations.
Basic settings
The first thing you need to do is create a space for staff appraisals in the employee register (if it doesn’t already exist).
Here, select the tab for staff appraisals. Then add page content by creating a row in the list, giving it a name you want to use in the employee register and choosing the type Staff appraisal. Here’s an example of how it could look:
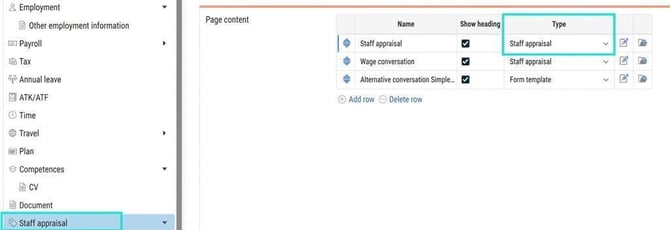
Besides the Staff appraisal type, you can choose the types Form template and Field groups. For more information about field groups, see the previous section about additional fields. However, Staff appraisal and Form templates are different. The difference is that for the Staff appraisal type you specify the Responsible person and date when you fill in a template in the employee register.
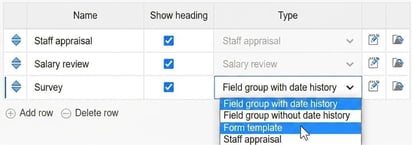
The idea is to be able to use these form templates for things other than just staff appraisals. For example, you could create different surveys and let employees respond to various questions. They can also be used for simpler conversation forms (where Responsible and signing are not as important to note), such as for follow-up or shorter review conversations. The range of use can be broad, so it’s up to you to use your imagination to find out how your organisation can make the most of this functionality.
Templates for conversations
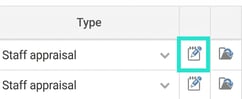
Once you’ve created page content for staff appraisals or form templates, it’s time to create templates. You do this by clicking the icon on the right in the list. In the window that opens, you create the various templates containing the questions to be completed during the staff appraisal or in the form.
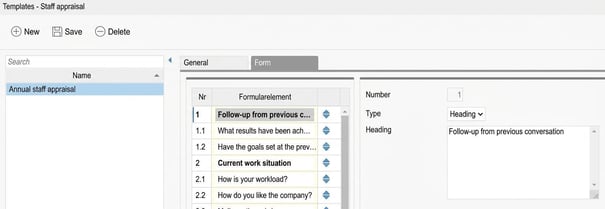
On the left of the image, the different templates are listed. For each template, you need to set a name and choose whether it should be active or not. This is useful if you’ve been working with a template for a while and then want to change the questions. You can then deactivate the old template and create a new one to use going forward.
Next, it’s time to create the various headings and questions in the template, which is done under Form templates. In the list, you see an overview of the template’s various headings and questions. Here, you add and delete questions and headings with the buttons below the list.
To see details or edit a question select the row in the list.
You can change the order of questions and headings in the list by dragging and dropping rows using the arrows on the right.
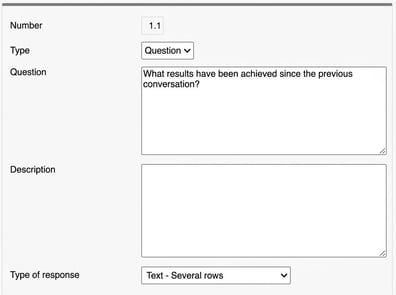
Each heading or question has a range of properties which you enter to the right of the list.
- Number
Each heading and question automatically gets a number. The first heading gets number 1, the second number 2, etc. The first question after heading 1 is numbered 1.1, the second question under heading 1 is 1.2, and so on. This builds a structure for the form.
- Type
Here you specify if it’s a Heading or Question.
- Question/Heading
Here you enter the text for the heading or question to be shown in the form.
- Type of response
If it’s a question, here you choose what type of response should be entered. You can choose from the following:
- Text – One row
Used for shorter responses - Text – Several rows
Used if you want to allow a longer, more detailed response. - Grading according to create (1-5)
Used for responses where you want an assessment on a scale of 1-5.
Read more about the functionality of staff appraisals in the section Staff appraisal.
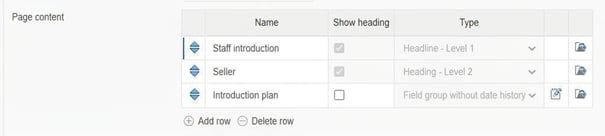
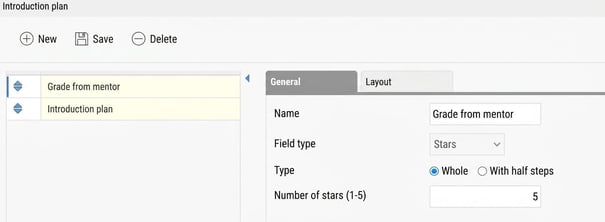
Example: Employee introduction – with Headline 1-2, field group without date history with stars and checkboxes
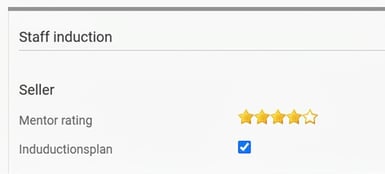
To set up the above example, follow the steps shown in the images below:
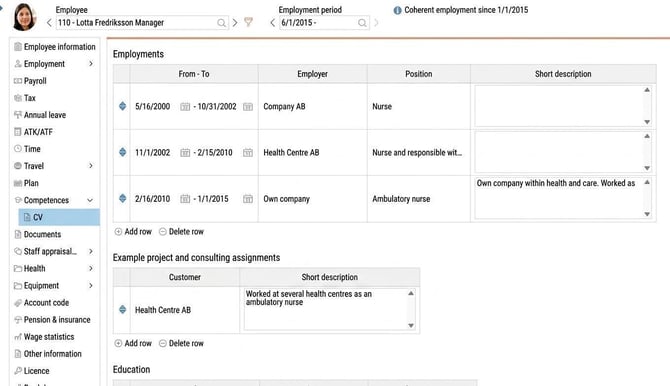
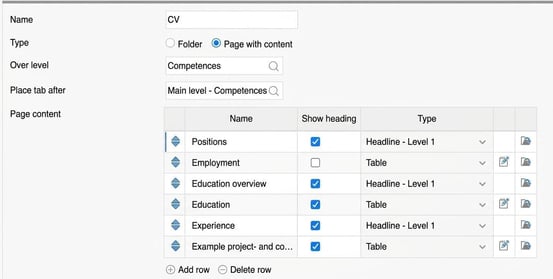
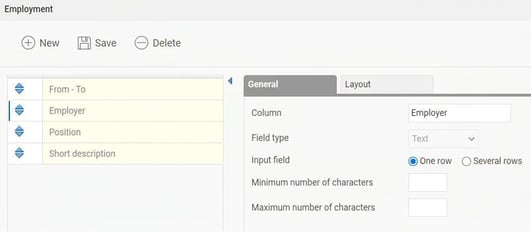
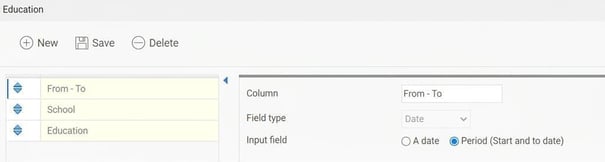
Example: CV – Table
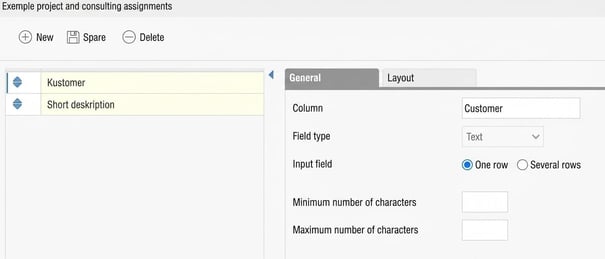
Example of date fields for monitoring
There is the option to create additional fields of the date field type. This way, you can easily choose a suitable date even for custom fields, which can be useful in, for example, own tables or for fields you wish to monitor.
Choose Field group without date history with the Date field type. Then select whether you want a standalone date, or a date range where you specify both From and To date.
Example of Inventory date – with date field
For example, say you have a field for key cards registered in the system and want to inventory key cards annually, relative to when the employee was issued their key card. To keep track of this, we need an inventory date for each employee.
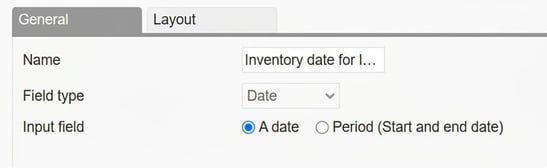
In the employee register, we then get a field where we can only specify the correct date according to the user’s national settings.

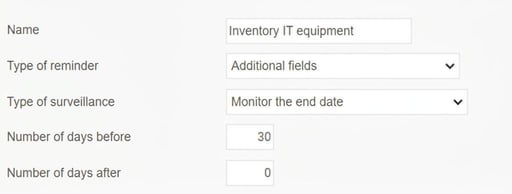
A concrete area of use for date fields is the ability to set reminders relative to an entered date. This is ideal in our example for notifying the manager, for instance, 30 days before the inventory date.
Example of how to set a reminder for a custom field:
Please note: This article is AI-translated. This means that linguistic errors or misunderstandings may occur.