
Register employee manually
Register user manually
Register new employee manually
Below is a description of how to manually register a new employee in HRM. The system provides support for new employment (Employee) as well as templates that can be used to simplify the process (New employment process in HRM Employee), but these are not used in this example.
Personnel - Employees
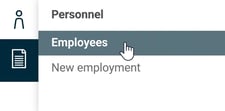
Click on New 
In the window that appears, specify the employee number, name, start of employment and any other relevant information to register in the system.
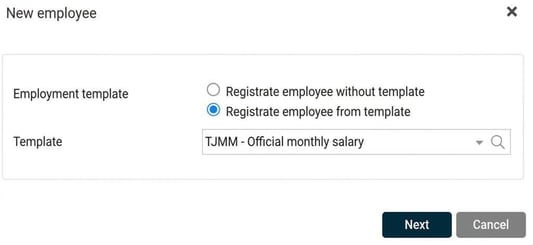
You can also choose to create the employee using an employment template.
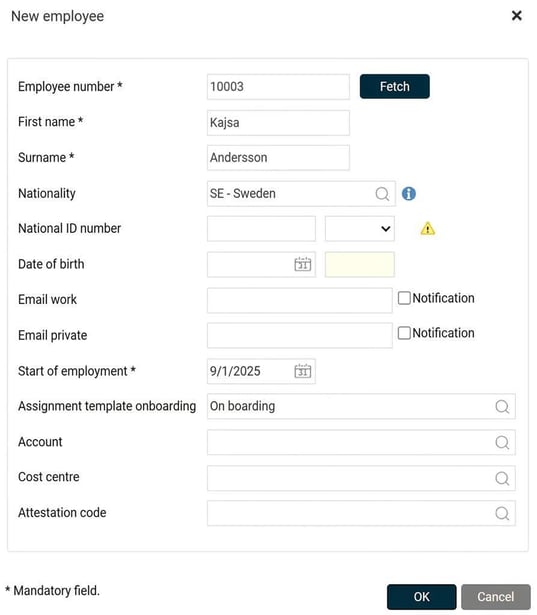
Click on OK.
The employee has now been created. In Employees you can now find the employee and complete additional information, such as employee information, employment data, and payroll.
Please note! Below is a brief description of some of the menus, but there may be more fields to register, and if you have several HRM modules, there may be additional menus that you need to go through.
Employment
Under the menu Employment you specify, among other things, contractual working hours, time group and schedule for the employee.
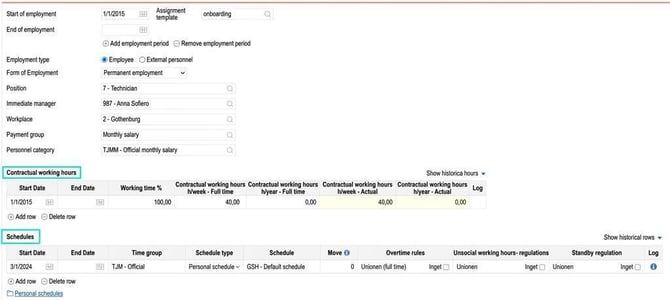
Contractual working hours is used as an example to see how the employee is scheduled according to their contractual working hours. If you use HRM Plan it is very important that all employment rates are correct
Schedule contains information on which time group the employee belongs to as well as which schedule the employee has. You can choose between a public schedule, which is a predefined schedule, or create a personal schedule for the employee. Rules for unsocial working hours allowance, overtime and standby are automatically linked when you select a time group (provided they are connected to the time group).
If the employee needs to have deviating rules, you register them here. Please note, for example, that there may be a different set of overtime rules for part-time employees.
Payroll
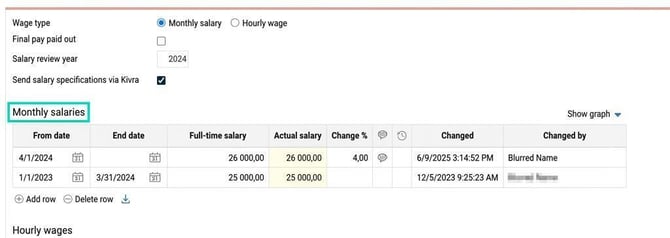
Under the menu Payroll you enter information about the employee’s payroll, such as monthly salary, bank details, etc. Always set the 'from' date on date-controlled fields such as monthly salary and hourly wage.
Tax
Here you register the tax table, employer's contribution and income statements.
Time
Here you can edit my profile settings for the employee that differ from the default settings for the company or time group.
Travel
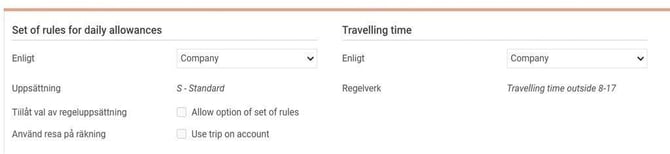
Under the menu Travel specific settings relating to the travel expense claim are specified. You can set deviating settings, for instance for allowance regulations and/or travelling time.
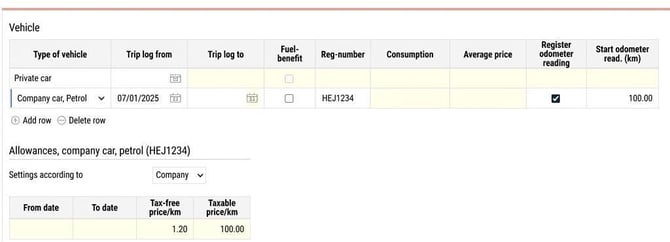
In the Vehicles section you can specify the type of vehicle the employee has. By default, the employee has a private car, but you can specify here if, for example, the employee has a company car.
Plan
Here you determine when the schedule should be published for the employee. You can also set formulas for time cost and work measurement difference.
Competences
Here you link specific competences to the employee.
Account code
Here you specify the account code dimensions relevant for the person.
Other information
Here you set whether the company number should be transferred to payroll and if you want to create payroll transactions. You can also specify a price.
Users
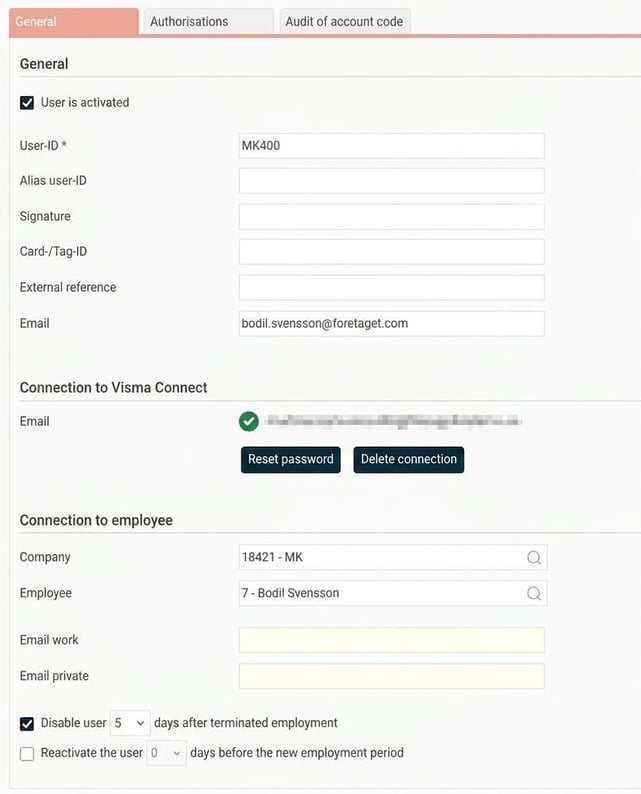
To be able to log in or clock time in HRM, each employee must have a connected user. The user has a unique User-ID. For a user to be able to log in, he or she must also be connected to Visma Connect using an email address.
In most cases, the user is easily linked via a user template. In that case, you only need to check that the user has received a user and the correct roles.
You can easily see if the employee has a user under Personnel > Employees > Employee information. See User-ID, is there an icon here? If yes, then there is a user linked. Click the icon to go to the User register.

To manually create a user and link them to an employee, go to Users.
Under the tab Authorisations you specify which authorisation the user should have in the system. If the employee should only report their own time report/travel expense claim, it is enough to save. The system will then give authorisation to the role set as the standard role in HRM. In this example, Employee.
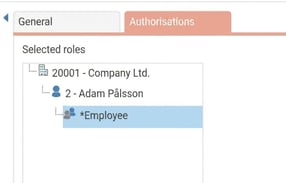
Should the employee be assigned additional authorisations, this is done by specifying for which company/account code, employee/employees, and what role.
The example below shows adding the role Approving manager for Attestation code PROD.
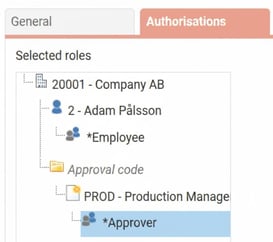
To grant approval rights to an attestation code follow the steps below.
- Specify for the current company the attestation code where approval rights should be granted
- Specify the role to apply. In this example, Approver
- Click on Add
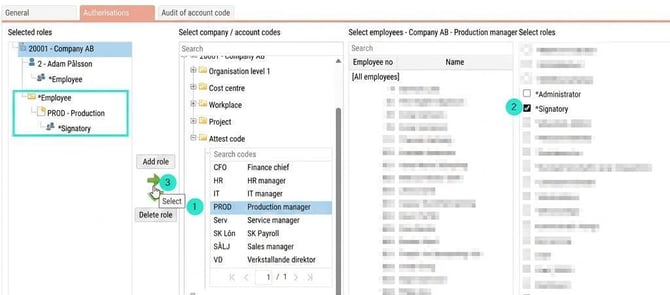
- Don’t forget to save.
Related articles
What is a user?
Please note: This article is AI-translated. This means that linguistic errors or misunderstandings may occur.