
HR-forms
An HR-form is a document that can retrieve information from the employee register in HRM. Examples of HR-forms include contracts of employment (that do not match the standard template in HRM), confidentiality agreements, and certificates. To generate an HR-form from HRM with the information and format of your choice, follow the instructions below.
Settings
Go to Settings – Personnel – HR-forms to upload your Word templates to be used as HR-forms.
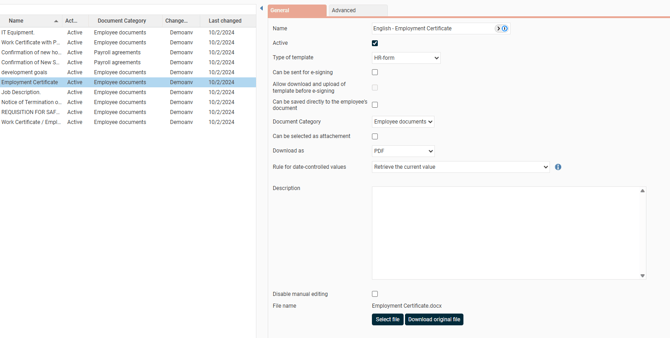
- Select name for your template in HRM.
- Choose whether your template should be active or not. Only set to active when it is ready to use.
- Select type of template.
- Choose whether it should be possible to save directly to the employee’s document
- Select document category
- Choose whether the template should be possible to choose as an attachment to contract of employment.
- Choose how the file should be downloaded, PDF, Word, or any format
- Select rule for date-controlled values. Here you choose which value should be retrieved for tags with date history such as monthly salary, hourly wage, contractual working hours, work measure, home account code, and additional fields

- Description: Here you can explain what this template is for, when it should be used, and for which personnel categories, if you have several active templates.
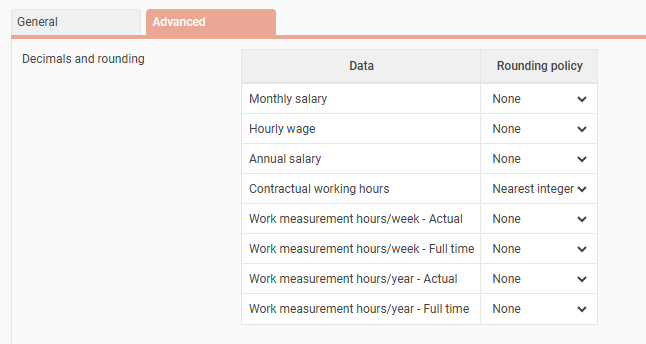
- Under the tab Advanced you can select handling for decimals and rounding.
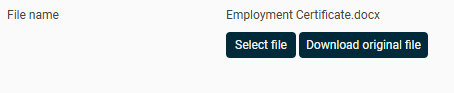
- Choose your file (the template you created in Word) here and click Save.
Before you upload your file, tag the document template with Available tags. See below how to create document templates in Word for HRM.
Create document template
We want HRM to include information already available in HRM in the HR-form. To do this, we need to prepare our document as a template.
Select available tags to see what you can insert into the template.

Below are the tags that are available to use. Use a tag by copying it and pasting it where you want it in your template, which is always based on a Word document (you can also write the tag yourself).
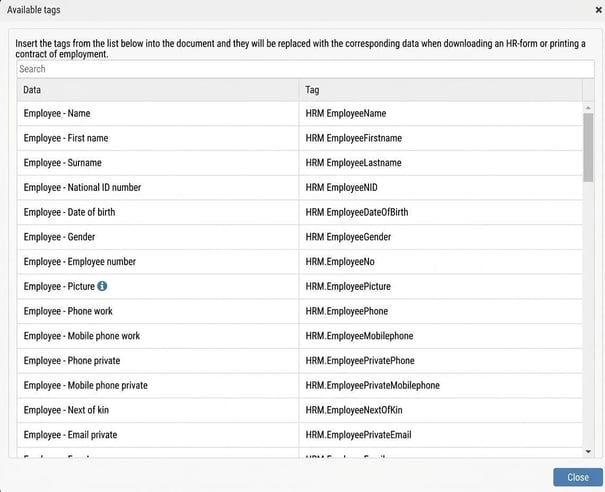
Copy the tags you want from the right-hand column and paste them into the document.
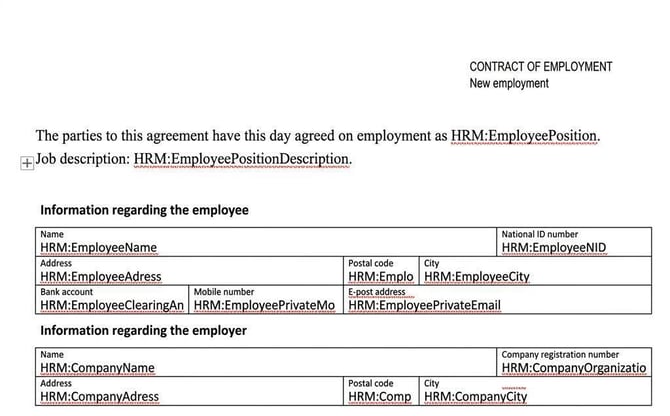
For a signature, for example, you can do the following to automatically include the printed name under the signature line: HRM:EmployeeName
Employee – Picture
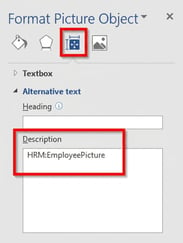
If you want to add a picture of the employee you are creating the form for, use the tag HRM:EmployeePicture (you can find it where Available tags are listed) anywhere in the document, i.e. where you want the picture to appear.
For better positioning of the picture, insert a standard image as a template. To replace the chosen template image with the employee’s picture from the employee register in HRM, right-click on it and select Edit Alt Text and paste the tag there. The picture will be in “HRM size” regardless of how large the image is in your template.
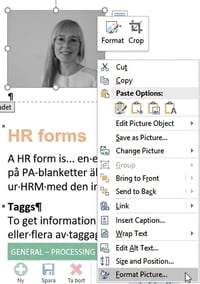
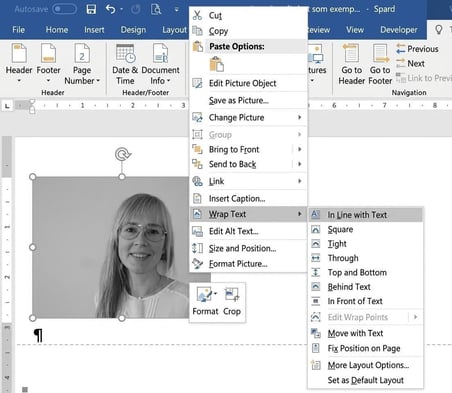
Always choose to format the image as appropriate for the situation by right-clicking on the image:
Employee – Additional fields
To insert the value from an additional field in your document, specify the tag and the name of the field within []. For example, HRM:OwnField[Pay rise]. Insert the tag anywhere in the document.
Employee – Own tables
To insert a table you have created in HRM, enter the table name/heading in HRM within [] in the tag. For example HRM:OwnTable[Work Experience]. Then insert the tag anywhere in the Word document.
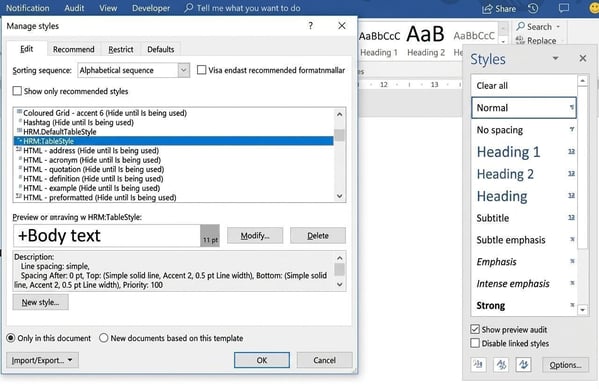
The table will use a standard format if nothing else is specified in the document template. If you want a custom format for the table, save a format in the document template with the name HRM:TableStyle of the type Table.


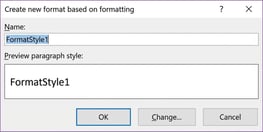
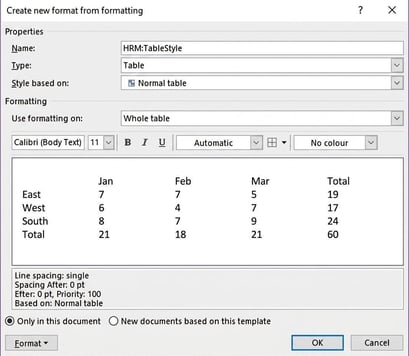
To edit formatting you have already applied, go to Format: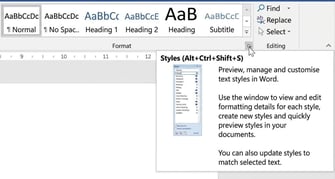
Create document template – Advanced
To make more attractive templates, it helps to use functions under the Developer menu in Word. To make this menu visible, go to File and Options and tick Developer as shown in the image below: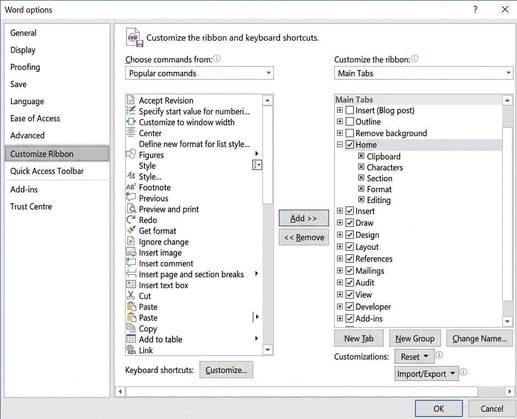

Authorisations
To activate settings for HR-forms, go to Administration – Users/Authorities – Roles.
Authorised to edit templates for HR-forms
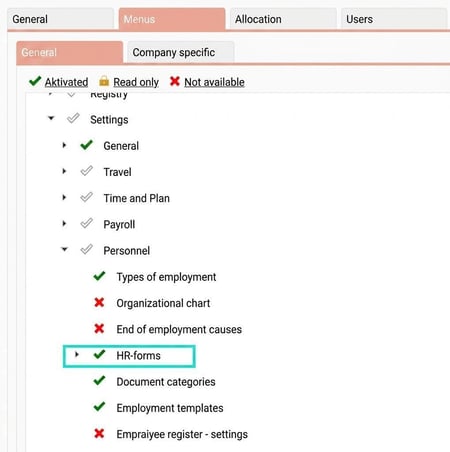
Set on the roles whether the role should be allowed to retrieve HR-forms for employees. For example, if managers should be allowed to retrieve HR-forms for certificates and CVs for their employees. Grant authorisation to the HR-forms and CV icon:

Set which document categories the role should be allowed to retrieve HR-forms for. Full authorisation (Activated) for the document category to which the HR-form is linked is required in order to retrieve it:
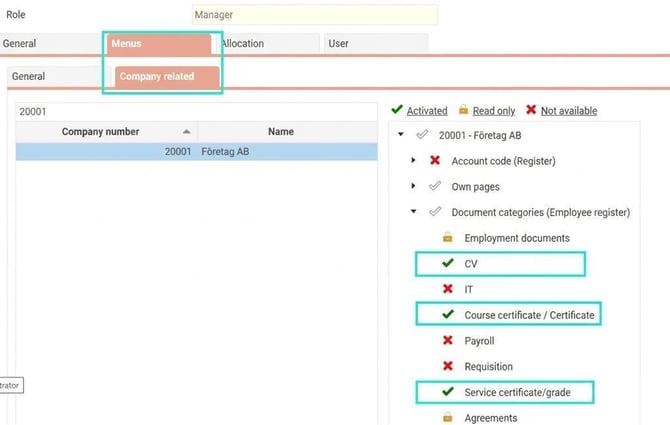
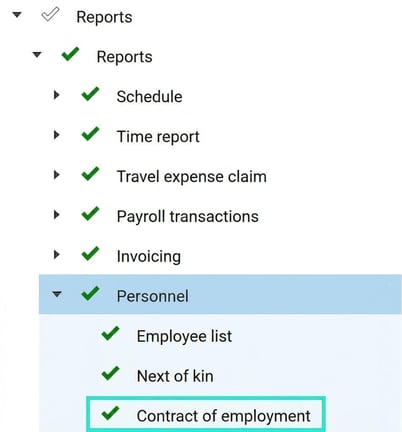
Authorised to retrieve Contract of employment?
Please note that you must have authorisation for HR-forms, document categories for relevant HR-forms and authorisation for The report Contract of employment in order to retrieve HR-forms via the button Contract of employment.
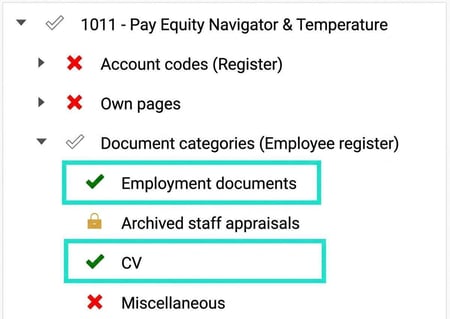
Control which HR-forms may be retrieved (Document category)
Below, HR-forms linked to the categories "Employment Documents" and "CV" may be retrieved. If there are HR-forms linked to the category "Miscellaneous", this role cannot retrieve these forms.
Report controls whether HR-forms of the type "Contract of employment" may be retrieved
For contracts of employment, the above is required plus this authorisation
Related articles
How do you manage documents for employees in HRM Employee?
How do Document categories work in HRM Employee?
Read more about how to send a document for E-signing.
Download a CV?
⚙️How do I create HR-forms for the front page in HRM Employee?
⚙️How do I create HR-forms for CV in HRM Employee?
Please note: This article is AI-translated. This means that linguistic errors or misunderstandings may occur.